Solution: Just open msconfig.exe. Click on the services tab. Click the box...Hide all Microsoft services. click on disable all. OK out and restart. check the drive accessafter you restart. If it works, you can enable one or a few services at a time to figure out which one is causing the problem.
Friday, October 31, 2014
USB DRIVE NOT ACESSIBLE, ACCESS DENIED - WINDOWS XP
Problem: I was able to access my usb drive in safe mode but not in normal start up.
Tuesday, October 7, 2014
How to Use Windows 7 Without Activation
Most of you might be aware of the fact that it is possible to use Windows 7 and Vista for 120 days without activation. This is actually possible using the slmgr -rearm command which will extend the grace period from 30 days to 120 days.
However, in this post I will show you a small trick using which it is possible to use Windows 7 without activation for approximately an year! Here is a way to do that.
Step-1: Go to “Start Menu -> All Programs -> Accessories“.
Right click on the “Command Prompt” and select “Run as Administrator“. If you are not the administrator, then you are prompted to enter the password, or else you can proceed to step-2.
Step-2: Now type the following command and hit Enter:
slmgr -rearm
Step-3: You will be prompted to restart the computer. Once restarted, the trial period will once again be reset to 30 days. You can use the above command for up to 3 times by which you can extend the trial period to 120 days without activation.
Step-4: Now comes the actual trick by which you can extend the trial period for another 240 days. To do this, open the Registry Editor (type regedit in “Run” and hit Enter) and navigate to the following location:
HKEY_LOCAL_MACHINE\SOFTWARE\Microsoft\Windows NT\CurrentVersion\SoftwareProtectionPlatform
Step-5: In the right-side pane, change value of SkipRearm to 1.
Step-6: Now, you should be able to use the slmgr -rearm command for another 8 times so that you can skip the activation process for another 240 days. So you will get 120 + 240 = 360 days of free Windows 7 usage.
120 days using “slmgr -rearm” command before registry edit
+
240 days using “slmgr -rearm” command after registry edit
= 360 Days
*** INFO FROM INTERNET ***
Friday, August 8, 2014
How to make your favorite animated GIFs into custom stickers on WeChat
WeChat can do many things, but one of my favorite aspects of China’s most popular messaging app is its support for GIF animations as stickers. Lots of chat apps have stickers these days, and Line even added a feature where users can create and sell their own, but these are mostly relegated to cutesy, G-rated material.
WeChat lets any user create and share custom stickers from the wild and wacky GIF memes we’ve all come to know and love on the internet. I’ve amassed a library of animated GIFs ranging from the weird to the trippy to the vulgar. Showing off your collection is often a conversation piece among the young expat crowd here in Beijing, where the western GIF meme trend has been imported onto to China’s local chat medium.
WeChat allows upward of 100 or so custom stickers to be stored. Most of these spread virally through friend groups, but if you really want to stand out from the crowd, you’ll have to make your own. Here’s how to take your favorite GIFs from the web and make them into custom stickers on WeChat.
1. Find a GIF

Short and sweet is the rule here. WeChat has pretty limited size requirements, which we’ll get into later, so you probably want the full animation to last no more than three seconds. Remember to pick something that will look good when it’s the size of your fingernail. I went with this one from Game of Thrones.
2. Resize it
Most GIFs are too big for WeChat by default. A Google search returns a ton of web-based GIF resizers that you can use for free. I recommend this one http://ezgif.com/resize , as some other ones I tried got messed up during step four. Finding the right pixel-to-file size ratio can be tricky, but you’ll want to stay below 250KB. WeChat will allow for a bit more, but you’ll start getting weird white artifacts at the bottom. If it’s a short GIF like this and you have some leeway, between 150 and 200 pixels tall is ideal.
3. Get it on your phone
If you’ve done steps one and two on a desktop like I have, you’ll need to get the image onto your phone. Pretty self-explanatory – just make sure it ends up in a folder that can be accessed via your phone’s default image gallery app.
4. Add it to WeChat
In WeChat’s “Discover” tab, head to the Sticker Shop. From there, click on the settings cog, and near the bottom you’ll see the “Custom” option.


This actually works with any appropriately-sized image file. If you simply want to save someone else’s GIF that they’ve sent in a chat, just long-press it and hit “Save emoticon.”
*** INFO FROM INTERNET ***
Monday, April 28, 2014
How to Check Windows XP Product Activation Status
To check, view or verify the Windows XP current activation status, open Run command from Start Menu, and run the following command:
oobe/msoobe /a
A “Activate Windows” dialog window will open to let user know the activation status. If the Windows XP has been activated, the message is “Windows is already activated. Click OK to exit.”
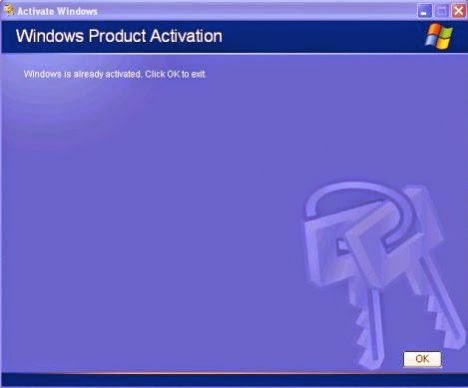
Else, you will be asked to let’s activate Windows now, which means that the copy of Windows XP installation is not yet activated.
*** INFO FROM INTERNET ***
Wednesday, April 9, 2014
How to Run Android Apps on a PC
BlueStacks App Player is available for Windows and OSX computers, and is a quick, compact install to your boot drive (there's no option in the installer to go to a different drive or directory). The only choice you make during the install is whether to allow the program to make notifications, as well as the option to opt in to BlueStacks Spotlight, which holds daily app giveaways.
Download
How to take a snapshot of a video
Download VLC Media Player http://www.videolan.org/vlc/index.html & open your media file with it.
If you want to take a snapshot, when you watch a film in VLC, press down the hot-key for snap shooting. The pre-defined hot-keys is in
MAC OS X: Command+Alt+s,
Windows,Linux, and Unix: Shift+s.
If you want to change the hot-keys go to Preferences → Interface → Hotkeys and set Take video snapshot. Then write the hot-keys you want.
After you have tacked a snapshot you may want to see it.
In Windows you can find it at: My Documents\My Pictures\
In MAC OS X: Desktop/
In Linux and Unix: $(HOME)/Pictures/
Monday, March 31, 2014
RUN Windows XP For Free In Windows 8
Microsoft gave Windows 7 users a way to run older applications via Windows XP Mode. With Windows 8, however, that mode is no longer officially supported, and if you want to run Windows XP in a virtual machine, you need the license for it. Lifehacker reader Miloš, however, has found a workaround. P
He discovered that within the free WindowsXPMode_en-us.exe file, there's a VirtualXPVHD file containing the Windows XP virtual machine, which you can open in VirtualBox. Here are the steps to get this working:P
Download WindowsXPMode_en-us.exe from Microsoft. You'll need to run the validation tool to prove your copy of Windows is valid. Then use 7-Zip or another archive tool to open the EXE file as an archive.
Within that archive, find the "sources/xpm" file within it, and extract that folder to your hard drive.
Finally, in the extracted xpm file, you'll find a file called VirtualXPVHD. Rename it with a VHD extension.
After you rename the file, open VirtualBox. Create a new virtual machine, give it a name, allocate some RAM, and when it asks to create a virtual hard drive, select the option "use an existing virtual hard drive file". Point it to the VHD file you made, and you're good to go!
In VirtualBox, open the VirtualXPVHD virtual machine, and voila! You've got Windows XP Mode (running Windows XP Professional) in Windows 8, no need for the XP license.
For How to bypass Windows Activation.. please read my previous post thru following link
http://andycabinet.blogspot.com/2014/02/how-to-turn-off-windows-vistaxp.html
Extra Notes:
a) ** This trick also works on windows 7,64 bit in Virtualbox.
However. During configuration the mouse will not work properly (at least in my case)
You must navigate through the XP setup using the keyboard (right click button, tab, spacebar, etc) to finish the configuration
After that, XP may hang a few times into a black screen. You must go to machine> Reset.
After that, once you are back to the desktop of XP, press WIN+R, then type appwiz.cpl
Then navigate using your keyboard and uninstall the "Virtual PC Integrated components" . You will be prompted to restart.
Restart it now. It would Have a black screen again. Reset the Virtualbox (machine >reset).
XP mode should now have working mouse input. Enjoy!
b) For Setting up Network Connection.
For Try to change network adaptor type to "Intel Pro/1000 T Server" as shown in the below.
** Give the guest (VirtualXP) two network adapters, Adaptor 1 set to NAT and the other (Adaptor 2) set to Host-only. The NAT one will allow the guest to see the Internet, and the Host-only one will allow the host to see the guest


*** INFO FROM INTERNET ***
Saturday, March 29, 2014
How to share folders in winxp with a password
Instructions
1. Click "Start," then "Control Panel" and select "User Accounts" from the list of options. The "User Accounts" window will open.
2. Click the "Guest Account" icon, then click "Turn on the Guest Account." Close the window.
3. Click "Start," followed by "Run" then type "cmd" in the open field and click "OK." The "Command" window will open.
4. Type "Net user guest password" at the command prompt, then press the "Enter" key. The option to create a password is now enabled on the guest account. Close the "Command" window.
5. Click "Start," then "Control Panel" followed by "User Accounts." Click on the "Guest Account" again. Type in a password in the "Change the password" box to protect the shared folders. Close the window, then restart your computer. To view shared folders all users must enter the password.
Thursday, March 6, 2014
Free disk space in Linux or SCO UNIX operating system
In Linux and Unix operating system, it’s possible to use “last” command to display and show the last logged in (and out) users history, and “lastb” command to show and display all the bad login attempts. The users’ login history is been logged and saved in wtmp file while faild login attempts is been stored in btmp file, both files For Linux usually located in /var/log directory. (For SCO Unix files normally is located in /var/adm)
To check your disk space, pls use the following command:
df -v
The logging of information into wtmp and btmp is continuous, and can potentially make the wtmp and btmp files grow very to a very big size. The situation is especially true to btmp, which logs failed or bad login attemps to the system, if the administrator does not disable FTP or SSH password authentication, and the server is been attacked via brute-force breaking in attempts, where any wrong user name or incorrect password been logged to btmp.
In addition, administrator may also want to clear and erase the history of login history once in a while. Or, system that running low or almost running out of disk space on /var may want to purge and delete the wtmp and btmp to reclaim and save some disk space.
In any case, the proper way to clear and reset wtmp and btmp files is by piping a blank input to the file, overwriting and replace all existing content. The command that can be used has the syntax like below:
cat /dev/null > /var/log/wtmp
or, on some system, simply like below:
> /var/log/wtmp
Note: Change the path and file name (i.e. btmp) accordingly.
Above commands will remove, clear and empty the content of the btmp or wtmp files, allowing new information to be started logging afresh again. The file is not been deleted or erased, and is leaved intact, as the btmp and wtmp files will not be recreated when not found. The system only logs information into these files if they are present.
Tip: For people who has already deleted the wtmp and btmp files, just re-create the file by touch command, and assign a proper permissions to the file (-rw-rw-r– root utmp or -rw—— root utmp btmp), or else “Excess permission or bad ownership on file /var/log/btmp or /var/log/wtmp” may occur.
Note that there may be files named as wtmp.1, wtmp.2 wtmp.3, wtmp.4, btmp.1, btmp.2, btmp.3, btmp.4, which are the backup archives, and can be safely removed or deleted.
*** Cron , boot.log, messages files in the /var/log directory also can be deleted.
Monday, February 24, 2014
How to Turn Off Windows Vista/XP Activation
Are you tired of 30-day trials? There are ways to bypass or ignore these messages, depending on the version of Windows you are using, which can help for those times when you can't find your old product key or are installing Windows on a computer that Microsoft won't let you register.
Windows Vista
1 Open the Registry Editor. You will be enabling the SkipRearm function, which when combined with another command will allow you to continually extend your trial period, effectively disabling registration.
Press the Windows key + R to open the "Run" dialog box.
Enter regedit and press Enter. This will open the Registry Editor.
2 Navigate to the correct folder. In the left frame, you can navigate to the different folders in the registry. Navigate to HKEY_LOCAL_MACHINE → SOFTWARE → Microsoft → Windows NT → CurrentVersion → SL
3 Double-click the "SkipRearm" entry. This will open a box allowing you to change the value. At default, it will read 00000000. Change the value to00000001 and press OK.
Close the Registry Editor after editing the entry.
4 Open the Command Prompt. You will need to do this as an administrator. To do this, click the Start button and enter cmd into the field. Press Ctrl + Shift + Enter to open it as an administrator.
5 Enter the command to restart the Software Licensing Manager. Entering in this command will reset the timer on your trial, and because you enabled SkipRearm in the previous step, you can perform this action indefinitely. Type the following and press Enter: slmgr -rearm. Close the Command Prompt by typingexit and pressing Enter.
6 Repeat the process every 30 days. You can repeat these steps every 30 days in order to reset your trial timer. You may or may not need to change the registry each time, it varies from system to system
Windows XP
1 Open the Registry Editor. You will need to make a tweak in your registry in order to make the activation messages disappear. Note that this method will only hide the notices, it will not bypass the activation. Windows will still need to be activated after 30 days. in order to truly crack Windows XP, you will need to download a cracking program or pirated key, which will not be discussed here.
Press the Windows key + R to open the "Run" dialog box.
Enter regedit and press Enter. This will open the Registry Editor.
2 Navigate to the correct folder. In the left frame, you can navigate to the different folders in the registry. Navigate to HKEY_LOCAL_MACHINE → SOFTWARE → Microsoft → Windows NT → CurrentVersion (or "Current Version") → WPAEvents.
3 Double click the OOBETimer entry. This will open a new dialog box where you can change the value.
4 Enter in the new value. Delete what's in the box and enter the following line. Click OK when you're done:
FF D5 71 D6 8B 6A 8D 6F D5 33 93 FD
5 Right-click on WPAEvents. Select Permissions from the menu.
6 Click the "SYSTEM" group. In the "Permissions for SYSTEM" frame, check the "Deny" box for the "Full Control" entry. Click OK when you're done.
Click "Yes" when asked to confirm your action. Exit the Registry Editor.
Subscribe to:
Comments (Atom)
-
Problem "When I start any application of the MS Office 2010.. I have to wait 2mins for the 'Configuring Microsoft Office Enterprise...
-
Video Tutorial: Here is a Html code link. http://dl.dropbox.com/u/10106165/weeblypasswordprotect.txt
-
 How To unblock Youku Videos on android Some videos are fine to watch, but many are inaccesible outside of China/region restriced. So does an...