Thursday, December 2, 2010

Add a fresh touch to your desktop with Christmas tree.


Here is animated Christmas Tree on the desktop. It is fully portable: just download zip file of any Christmas tree, unzip it and double click icon to see animated Christmas tree on the desktop.

You can move the tree to any part of the desktop by dragging with mouse. You can also set transparency levels to specific percentage by right clicking the animated tree. There are options to stay on the top and run at the startup.

Above are few designs of available Christmas trees. Download any animated tree of your choice and pin it anywhere on the desktop.

Grab Desktop Christmas Trees..

Tuesday, November 16, 2010

How to Password Protect Page in Weebly -No Pro!

Video Tutorial:


Here is a Html code link.
http://dl.dropbox.com/u/10106165/weeblypasswordprotect.txt

Free Website Flash Music Player

Need a background music on your site? Use melodyloops flash music player to play the music on your site or blog.

Here is a HTML code sample:


Here is a Link...

Thursday, October 14, 2010

How to permanently delete your facebook account.

HOW TO DELETE...
Go here :
http://www.facebook.com/help/contact.php?show_form=delete_account

Click "Submit" and follow the instructions.

Your account will be deactivated for two weeks, and if you DO NOT USE FACEBOOK IN ANY WAY during that period, your account is permanently deleted.

I REPEAT: Your profile isn't deleted right away! You must NOT log in to, or interact in any other way with Facebook for at least two weeks, as it will cancel the deletion request. That includes NOT logging in to Facebook using any client (like the iPhone app or IM:s like Pidgin), NOT clicking embedded Like-buttons on other websites, NOT logging in to other services using Facebook Connect (like Digg) etc etc.

Monday, September 6, 2010

Install Windows XP using USB Flash Disk/ Flash Drive - Step by Step Guide

Here is a Link...

Good Luck..

Make Your Windows XP Genuine.

Windows xp universal key

RHKG3 8YW4W 4RHJG 83M4Y 7X9GW

this key works on all windows xp edition and with any service.

Here's how to make your copy of windows genuine...


Download jellybean keyfinder from this website

Now open keyfinder.exe

Click on options and click "change windows key"

Now enter this key and you're done.

*****************************

V2C47-MK7JD-3R89F-D2KXW-VPK3J

*****************************

P.S: this works on windows xp pro and home sp2 only......

antoher way is entering this key while reinstalling.

DCK39-9YQYJ-CXJTQ-9W68B-QGQW3

******** THIS INFORMATION IS COLLECTED FROM INTERNET*******

Monday, August 23, 2010

Easy method to get key of a secured wireless network

1) Create Boot Beini USB flash stick...

Answear to no applications loaded when making a bootable USB flash pendrive by unetbootin-windows
software edition: unetbootin-windows-372.exe;beini-1.0-rc4

here is it : add this startup parameter "waitusb=6" .
this has been done by default in beini editions higher than beini-1.0-rc4 .
at last,don't forget to copy files in directory tce in ISO to directory tce in USB flash pendrive.

for some USB flash stick with larger capacity or slow speed,
please ajust the parameter value of waitusb(the larger value,the more boot time ).
for example, waitusb=20 , it will ensure system to have enough time to mount USB drive,load software packages in TCE.


Video Tutorial


Download Beini 1.0 Final


Download UNetbootin

2) After finish created bootable Beini usb flash disk.. Restart your PC & boot from usb flash disk..Then hack the wireless network key by running Feeding Bottle application.

Video Tutorial

Note: I have been experimenting using a deauth / ARP replay attack parameter is more faster to get the result.


To get this method success..please make sure that you got a wireless network card supported by Beini. Wireless card supported list.

Saturday, August 14, 2010

Asterisk Logger - Reveal Marked Password

On most application programs and web browsers, the password field is protected and masked with asterisks (or stars aka ********* symbols) when user entering the secret credentials into the text box on web pages or program’s interface to avoid hacker peeps over the shoulders. Asterisk masking of password is good security measure. However, in some scenarios, there may be a need to reveal and show the hidden password string or value hidden behind the asterisks.

So when user forgets or misplaces the password for particular website or service or software application, it’s possible to retrieve and recover the password from the saved password, if user can reveal and view the masked password hidden under the asterisks on password field on web pages or program’s user interface.


Download

My Favourite Windows Media Player Skin

Transformers skin.


Download

Dropbox – my favorite free online file storage

I wanted to take a minute and share one of my favorite and most used applications –Dropbox

What is Dropbox?

Dropbox is an online file storage application that you install on any computers you might use. Through a simple drag-and-drop interface, your files are securely uploaded over a SSL connection, stored to a server and automatically copied to any computers that you have Dropbox installed on with the same ID.

I currently have Dropbox installed on my laptop PC, and my PC at work. This makes it simple to transfer work files as well as keep revisions of projects I work on.

Here’s some other bits of info on Dropbox that I like:

Features of Dropbox

Drag-and-drop interface (I also threw a shortcut in my Send To folder so I can just right-click a file and send it to my Dropbox)


Sync with other computers


Use multiple platforms – currently Dropbox will sync between Windows, Mac, and Linux. (I believe there is also a feature or add-on that will allow iPhone users to access Dropbox as well – nothing for Mobile Windows…yet.)

Access from anywhere. Not at your computer? No problem – just use any computer to log on to your Dropbox account and you can view, retrieve, and add files. When you get back to your computer, your files have already been synchronized and are waiting for you.

Log any file changes. Dropbox will remember changes you made to files and show you a revision history – it will even allow you to restore files you may have deleted.

Share files with other non-Dropbox users - share a folder and add work colleagues, friends, family, etc… They can all have access to your files depending on how you set the users up. You can even drop files in your Public folder – right click the file and it will give you a link you can email to people so they can access your file as well.

Easy to use interface. When you log on to Dropbox, you can view any and all changes made to your files by you and anyone you might share that file with.


Share your photos. Drop photos in your Dropbox and share them with others thru a web gallery. It’s not as advanced as Flickr or SmugMug but it gets the job done.

So how much is it?

Anyone can join for free and receive 2GB of free storage.

Wednesday, July 28, 2010

Hack to Logon to WinXP with DreamPackPL


If you forget Windows XP or Windows 2000 account password, especially administrator password which once lost together with user account passwords, will make you unable to logon and access to Windows desktop, you can use crack program or crack bootable CD to retrieve and recover the user ids and passwords, or use third-party services to brute force guessing the password retrieval, or using workaround trick to reset the password, or some other methods. Another method to solve the forgotten or lost Windows login account password problem is by using DreamPackPL which allows users to login to a password protected Windows and have full access to Windows XP or Win2000 without the need of a valid password or the need to change or replace the existing (old) password.

DreamPackPL allows any user to bypass Windows login security and logon to Windows XP or Windows 2000 computer even though the user have forgotten or lost the valid password, and without the need to reset or modify or change the existing passwords that are currently set with the accounts. DreamPackPL (version 2oo4.o6.1o) is actually built on DreamPack which consists only the hacked and patched sfcfiles.dll, but with graphical user interface (GUI) and built-in function to create an ISO image that can be burnt to CD. DreamPackPL v2004.06.10 is available as free download. When executing, DreamPackPL has 3 options:

The first option, Install (need administrative rights) will install DreamPack and automatically replace original sfcfiles.dll with patched version of sfcfiles.dll. After reboot, DreamPack will turn off Windows logon password check so that user can virtually access to every local account without knowing the password and modifying the password.

The second option, Create CD will create a new bootable CD with DreamPackPL by using original Windows (2000 or XP, both will work to get access to WinXP or Win2K) installation CD. The CD ISO image creation process with DremPackPL can only be done in Windows 2000/XP, and free space of at least 400-600MB is needed. After the ISO image file is created, it has to be burnt to CD by using any CD burning or writing program such as Ahead Nero. Alternatively, simply download the pre-created bootable dreampackpl_iso.zip which pre-loaded with patched sfcfiles.dll to bypass the Windows logon security check. Extract the zip file to get the ISO image and then burn the image to a CD.

Option 3 will extract SFCFILES.DLL file to selected path, which can be used to manually replace the original SFCFILES.DLL on the target system’s \Windows\System32 folder if user can boot the system using other software such as bootable DOS, BartPE, PE or XPE and the system uses FAT partition.

For the following hack into Windows XP and Windows 2000 machine without valid password yet not reset any password tutorial, we’ll follow option 2.

1. Physical access to the target destination PC is a must.
2. Download DreamPackPL and create a patched bootable CD or simply download directly the properly done and patched ISO image (unzip after
downloaded).
3. Burn or write the ISO image to CD.
4. After the boot CD disc is created, restart the PC, and boot from the CD/DVD drive.
5. User will come to Windows 2000 (or Windows XP) Setup screen.
6. User must load system in Recovery Console, so press R to continue and install DreamPackPL.
7. Press C to install DreamPackPL by using Recovery Console.
8. Then select which Windows (XP/2000) installation that want to log onto by keying in appropriate number (normally 1 for system with only 1 Windows installation).
9. Key in any password when prompt for Administrator password.
10. Make a backup of the original sfcfiles.dll by using the following command:

ren C:\Windows\System32\sfcfiles.dll sfcfiles.lld (for Windows XP)

or

ren C:\Winnt\System32\sfcfiles.dll sfcfiles.lld (for Windows 2000)

11. Copy the patched sfcfiles.dll file from the CD to \Windows\System32 (or \WinNT\System32 depending on your Windows installation) folder by using following command (CD drive in this example is D, change according to your CD drive letter. You can use “map” command to display all drive letters):

copy D:\i386\pinball.ex_ C:\Windows\System32\sfcfiles.dll (for Windows XP)

copy D:\i386\pinball.ex_ C:\Winnt\System32\sfcfiles.dll (for Windows 2000)

12. Type “Exit” and press Enter to exit from Recovery Console, and restart the PC, and let the Windows boot normally.
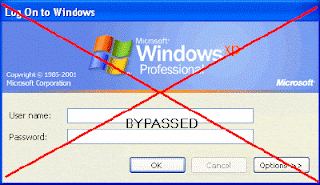
13. Once Windows display Windows Logon prompt, key in “dreamon” DreamPackPL command (without quotes) in the user name or password field to display the DreamPackPL menu.

14. Click on the top graphic on the DreamPackPL menu to display the commands options and configuration menu.
15. Navigate to Command and click on Command Setting options.
16. Enable the God-Password setting by selecting (check) the tick box at the end.

17. Exit from all DreamPackPL and type “god” in the user name or password field on Windows Logon screen to log on into Windows, bypassing all users or administrator account password.
18. Another option is to navigate to Password at DreamPackPL commands settings menu and select (check) the “Logon with wrong password and hash” option, which allows user to log-in into Windows using any administrator or user account with any correct or wrong password.


*** I preferred using option 3 which is much simple.

1. First, Creating a Windows xp Bootdisk.

Instruction for How to Create MS-DOS bootable diskette

When formatting a floppy diskette, users have the option of creating a MS-DOS startup disk, follow the below steps to do this.

Place diskette in the computer.

Open My Computer, right-click the A: drive and click Format.

In the Format window, check Create an MS-DOS startup disk.

Click Start.

2. RUN DreamPackPL Program.

3. Choose Extract. save sfcfiles.dll to your A: drive (Floopy Drive) which is in a Winxp Bootdisk.

4. Restart your PC using a Winxp Bootdisk & Boot from A drive.

5. Go to c: Drive
c:\

6. Rename filename sfcfiles.dll to sfcfiles.lld
"ren C:\Windows\System32\sfcfiles.dll sfcfiles.lld" (without quotes)

7. Copy sfcfiles.dll from A drive (Floopy disk) into c:\windows\system32\
“copy a:\sfcfiles.dll_ C:\Windows\System32\sfcfiles.dll" (without quotes)

8. Then restart your PC.

9. Follow Step 13 in option 2 s described above to complete it..


DreamPack or DreamPackPL has the following features:

* Configurable command interpreter in logon window (DreamOn, PassOn, PassOff, LogonLoggerOn, LogonLoggerOn, LogonLoggerOff, DreamDesktop, God-Password)
* Three logon modes: standard with password, with wrong password and wrong hash (LM+NT), with given hash (LM+NT)
* Hash Audit (show hashes of all users) and Hash Calculator
* Executing programs at the logon desktop with system privileges
* Loading Explorer shell at new desktop and work with system privileges
* Logon Logger (date and time, user name, password, character codes in password)
* Disabling Windows File Protection (always when using DreamPack).

Note: You may need to disable the anti-virus protection software in order to use DreamPackPL to bypass Windows password logon security check to login into Windows system without any password modification or reset to existing accounts’ passwords, nor leave any trace of logging on. DreamPackPL can be easily uninstall by choosing Uninstall from commands menu, and the original sfcfiles.dll will be automatically recovered from sfcfiles.lld backup file.

Download.

*** THIS INFORMATION IS COLLECTED FROM INTERNET ***

Monday, July 26, 2010

Simple Desktop Lock Application

W2KLockDesktop application was designed to be a simple command line tool that will lock the desktop immediately. You can lock your computer by one click.


OS: Win 2000/XP/2003/Vista.


Download.

Tuesday, July 20, 2010

Friday, July 16, 2010

Install Chrome OS to USB


Thanks to our friend Jorge Sierra at Makeuseof.com, we can now install Chromium OS, the open source version of Chrome OS to a USB drive. This will allow us to boot the OS natively on our computer, not in virtualization software.

I will walk you through how to install Chrome OS on your USB drive and boot your computer with it.

Things you will need:
1. 4 GB or larger USB drive
2. Image Writer program
3. USB image of Chrome OS
4. A Windows computer that can boot from a USB drive


1. Download the USB image and Image writer program.

You can use Mr. Sierra's torrent file to download the Chrome OS USB image:Chrome OS USB torrent file (just right click it and select "Save Link as...). You will need a BitTorrent client to download the image via the torrent (I recommend utorrent). Or you can simply download the file here: Chrome OS USB image. For Windows, a program called Image Writer for Windows will be included in the torrent or file download. I will show you how to install Chrome OS on a USB drive in Windows.

2. Write Chrome OS Image to USB drive

To write the Chrome OS image to your USB drive, you will need to run the Image Writer for Windows by clicking on "Win32DiskImager" file that you downloaded with the Chrome OS image. After you install it, run the program and browser for the Chrome OS image clicking on the folder icon beside the text field in Image Writer. Select the image, then select your USB drive under the device section. If you don't know the letter of your drive, go to My Computer and see what label it has (should be (G:) or (H:) depending on how many drives you computer has). The writing process takes a few minutes, so don't be alarmed at its slowness.

Now select "write" to write the Chrome OS image to your USB drive.

3. Booting the Chrome OS USB image

Next, you will boot into Chrome OS using the USB image. First you will make sure your computer is set to be able to boot from a USB drive. To do this, simply change the boot setting in BIOS to look for a USB boot image (move USB drive above Hard Disk in you boot sequence). Now restart your computer with the Chrome OS USB plugged in and it should boot it before looking at your hard drive for an operating system.

Share a Printer from XP to Windows 7/8/10

  Setup Printer Sharing Step 1 : First make sure that the printer on the XP machine is shared. You can do this by right-clicking on the prin...