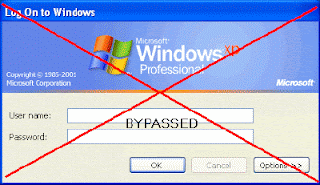
If you forget Windows XP or Windows 2000 account password, especially administrator password which once lost together with user account passwords, will make you unable to logon and access to Windows desktop, you can use crack program or crack bootable CD to retrieve and recover the user ids and passwords, or use third-party services to brute force guessing the password retrieval, or using workaround trick to reset the password, or some other methods. Another method to solve the forgotten or lost Windows login account password problem is by using DreamPackPL which allows users to login to a password protected Windows and have full access to Windows XP or Win2000 without the need of a valid password or the need to change or replace the existing (old) password.
DreamPackPL allows any user to bypass Windows login security and logon to Windows XP or Windows 2000 computer even though the user have forgotten or lost the valid password, and without the need to reset or modify or change the existing passwords that are currently set with the accounts. DreamPackPL (version 2oo4.o6.1o) is actually built on DreamPack which consists only the hacked and patched sfcfiles.dll, but with graphical user interface (GUI) and built-in function to create an ISO image that can be burnt to CD. DreamPackPL v2004.06.10 is available as free download. When executing, DreamPackPL has 3 options:
The first option, Install (need administrative rights) will install DreamPack and automatically replace original sfcfiles.dll with patched version of sfcfiles.dll. After reboot, DreamPack will turn off Windows logon password check so that user can virtually access to every local account without knowing the password and modifying the password.
The second option, Create CD will create a new bootable CD with DreamPackPL by using original Windows (2000 or XP, both will work to get access to WinXP or Win2K) installation CD. The CD ISO image creation process with DremPackPL can only be done in Windows 2000/XP, and free space of at least 400-600MB is needed. After the ISO image file is created, it has to be burnt to CD by using any CD burning or writing program such as Ahead Nero. Alternatively, simply download the pre-created bootable dreampackpl_iso.zip which pre-loaded with patched sfcfiles.dll to bypass the Windows logon security check. Extract the zip file to get the ISO image and then burn the image to a CD.
Option 3 will extract SFCFILES.DLL file to selected path, which can be used to manually replace the original SFCFILES.DLL on the target system’s \Windows\System32 folder if user can boot the system using other software such as bootable DOS, BartPE, PE or XPE and the system uses FAT partition.
For the following hack into Windows XP and Windows 2000 machine without valid password yet not reset any password tutorial, we’ll follow option 2.
1. Physical access to the target destination PC is a must.
2. Download DreamPackPL and create a patched bootable CD or simply download directly the properly done and patched ISO image (unzip after
downloaded).
3. Burn or write the ISO image to CD.
4. After the boot CD disc is created, restart the PC, and boot from the CD/DVD drive.
5. User will come to Windows 2000 (or Windows XP) Setup screen.
6. User must load system in Recovery Console, so press R to continue and install DreamPackPL.
7. Press C to install DreamPackPL by using Recovery Console.
8. Then select which Windows (XP/2000) installation that want to log onto by keying in appropriate number (normally 1 for system with only 1 Windows installation).
9. Key in any password when prompt for Administrator password.
10. Make a backup of the original sfcfiles.dll by using the following command:
ren C:\Windows\System32\sfcfiles.dll sfcfiles.lld (for Windows XP)
or
ren C:\Winnt\System32\sfcfiles.dll sfcfiles.lld (for Windows 2000)
11. Copy the patched sfcfiles.dll file from the CD to \Windows\System32 (or \WinNT\System32 depending on your Windows installation) folder by using following command (CD drive in this example is D, change according to your CD drive letter. You can use “map” command to display all drive letters):
copy D:\i386\pinball.ex_ C:\Windows\System32\sfcfiles.dll (for Windows XP)
copy D:\i386\pinball.ex_ C:\Winnt\System32\sfcfiles.dll (for Windows 2000)
12. Type “Exit” and press Enter to exit from Recovery Console, and restart the PC, and let the Windows boot normally.
13. Once Windows display Windows Logon prompt, key in “dreamon” DreamPackPL command (without quotes) in the user name or password field to display the DreamPackPL menu.
14. Click on the top graphic on the DreamPackPL menu to display the commands options and configuration menu.
15. Navigate to Command and click on Command Setting options.
16. Enable the God-Password setting by selecting (check) the tick box at the end.
17. Exit from all DreamPackPL and type “god” in the user name or password field on Windows Logon screen to log on into Windows, bypassing all users or administrator account password.
18. Another option is to navigate to Password at DreamPackPL commands settings menu and select (check) the “Logon with wrong password and hash” option, which allows user to log-in into Windows using any administrator or user account with any correct or wrong password.
*** I preferred using option 3 which is much simple.
1. First, Creating a Windows xp Bootdisk.
Instruction for How to Create MS-DOS bootable diskette
When formatting a floppy diskette, users have the option of creating a MS-DOS startup disk, follow the below steps to do this.
Place diskette in the computer.
Open My Computer, right-click the A: drive and click Format.
In the Format window, check Create an MS-DOS startup disk.
Click Start.
2. RUN DreamPackPL Program.
3. Choose Extract. save sfcfiles.dll to your A: drive (Floopy Drive) which is in a Winxp Bootdisk.
4. Restart your PC using a Winxp Bootdisk & Boot from A drive.
5. Go to c: Drive
c:\
6. Rename filename sfcfiles.dll to sfcfiles.lld
"ren C:\Windows\System32\sfcfiles.dll sfcfiles.lld" (without quotes)
7. Copy sfcfiles.dll from A drive (Floopy disk) into c:\windows\system32\
“copy a:\sfcfiles.dll_ C:\Windows\System32\sfcfiles.dll" (without quotes)
8. Then restart your PC.
9. Follow Step 13 in option 2 s described above to complete it..
DreamPack or DreamPackPL has the following features:
* Configurable command interpreter in logon window (DreamOn, PassOn, PassOff, LogonLoggerOn, LogonLoggerOn, LogonLoggerOff, DreamDesktop, God-Password)
* Three logon modes: standard with password, with wrong password and wrong hash (LM+NT), with given hash (LM+NT)
* Hash Audit (show hashes of all users) and Hash Calculator
* Executing programs at the logon desktop with system privileges
* Loading Explorer shell at new desktop and work with system privileges
* Logon Logger (date and time, user name, password, character codes in password)
* Disabling Windows File Protection (always when using DreamPack).
Note: You may need to disable the anti-virus protection software in order to use DreamPackPL to bypass Windows password logon security check to login into Windows system without any password modification or reset to existing accounts’ passwords, nor leave any trace of logging on. DreamPackPL can be easily uninstall by choosing Uninstall from commands menu, and the original sfcfiles.dll will be automatically recovered from sfcfiles.lld backup file.
Download.
*** THIS INFORMATION IS COLLECTED FROM INTERNET ***


